...
- Launch IntelliJ and open an OpenLMIS project.
- Download SonarLint plug-in from theSonarLint IntelliJ plug-in site. The download is a .zip file. Keep it zipped (you do not need to unzip it).
- In IntelliJ, open Settings (called Preferences on Mac), then go to Plug-ins and click "Install plug-in from disk":

- Select the plug-in zip file you downloaded. You may need to re-launch IntelliJ for the new plug-in to become active.
- Open SonarQube, register for an account, and generate a token for yourself (TBD: PERMISSIONS MAY NEED TO CHANGE TO ALLOW THIS; OR ALL DEVS SHARE ONE TOKEN?)
- Set the SonarLint General Settings. You will need to add the connection to the OpenLMIS SonarQube server. Click the "+" button and fill in the dialog box that appears:

The Server URL is "http://sonar.openlmis.org". The Authentication type is Token. Enter the token you created in the step aboveYou do not need to change the default Authentication type and you do not need to enter a Token (leave the Token field empty). Use the "Test Connection" button to make sure it worksyour IntelliJ can connect to the OpenLMIS Sonar. - Set the SonarLint Project Settings:

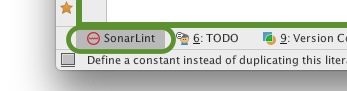
Click "Enable binding...", then select the OpenLMIS server you added in the previous step. Then select the project that corresponds to whichever project you have open in IntelliJ. - That's it! Now you can use the SonarLint feature inside IntelliJ to get immediate feedback.
- The Project Settings are made per IntelliJ project, so you will need to open up each OpenLMIS project you are working on and set the project settings for each one. Each one connects to that IntelliJ project to the matching project in SonarQube.
...